Many of our users who build UI prototypes often ask us how different is Indigo Studio from Axure. Perhaps our users have prior experience with Axure or similar products, and simply wish to understand how much of their learned experience can be transferred to Indigo Studio.
Unlike many of the tools that approach prototyping as linking screens, Indigo Studio and Axure adopt the state model in addition to screens. And while the two offer similar capabilities in creating interactions and widget/page states, both go about it in a different way. This article may appeal more to folks who are reasonably familiar with Axure and have started with Indigo Studio. What this article is not is a feature by feature comparison of the two; it focuses on core-prototyping workflows instead.
We created the exact same prototype using both tools to make it easier to compare the prototyping workflow. The prototype simulates a bidding website, where people can bid on products. Users can hover on a product shown and peek at the product details, which is shown as a pop-up. In this pop-up, users can view other product images and place a bid. Placing a bid shows a confirmation message and then users can close out the pop-up.
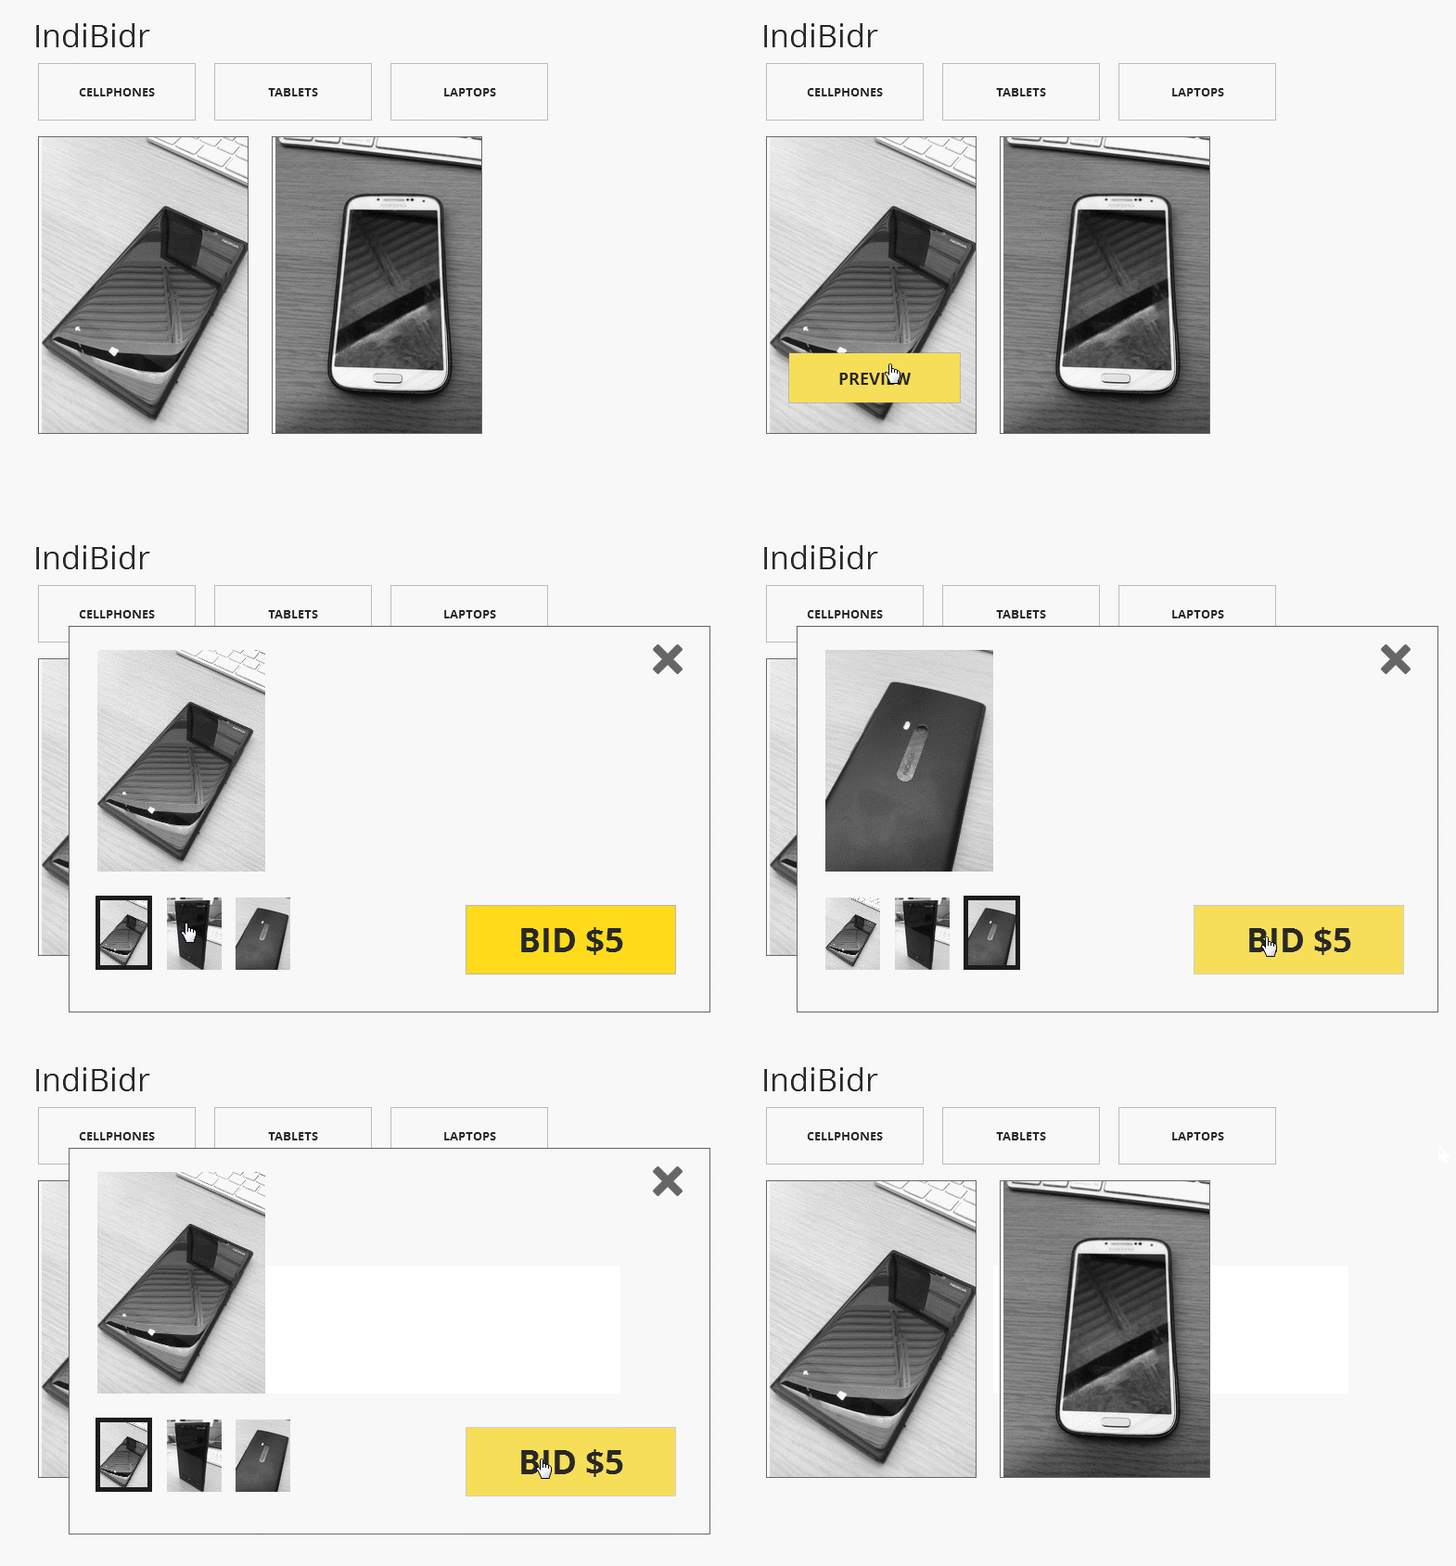
Part 1 of this article discusses the following:
- Interactions Later vs. Interactions First
- Case Editor for UI changes vs. Direct Manipulation in Context
Part 2 will discuss other key differences:
- Adding time-based changes via actions vs. coordinating changes using a timeline
- Manage Prototype using alternate views vs. Interaction Explorer for visualizing user flow
- Widgets States vs. Screen States plus widget states
1. Interactions Later (Axure) vs. Interactions First (Indigo)
Take for example the quickView interaction shown in the prototype. Clicking on the quickView button will launch/show the productPopup. The assumption is that you have already created the home page/screen, which has the quickView button available.
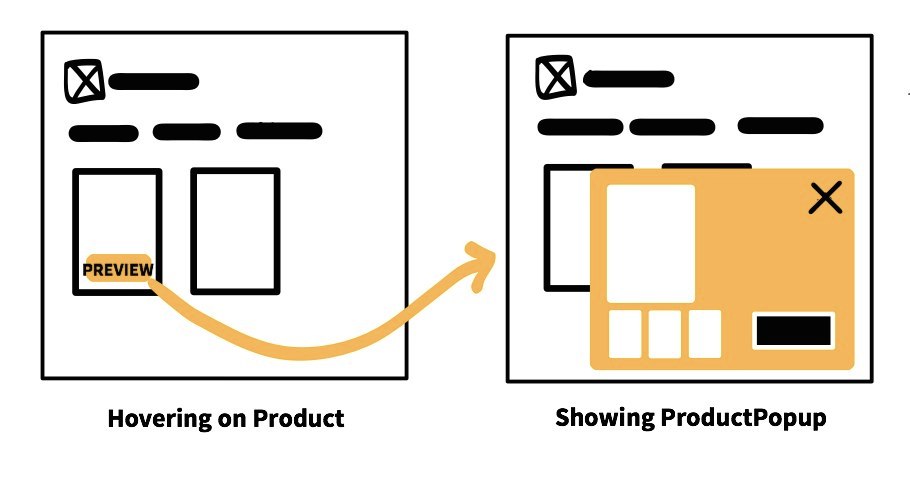
In AXURE, you use Dynamic Panel to support this interaction, and create the necessary state(s) first. Without creating these, you cannot add interactions.The prototyping workflow is as follows:
- Add a
RectangleUI element to serve as the popup on the Home screen. - Convert this
rectangletoDynamic Paneland name it productPopup - Set to productPopup to
Hiddenby default usingWidget Properties - Select and edit
State 1of productPopupDynamic Panel(available in the widgets panel) - Add necessary UI elements inside
State 1to finish the productPopup - Go back to the Home and add a
onClickinteraction on the quickView button. - In the
Case Editor, selectShowbehavior and select productPopup from the list
Watch Video Clip- Adding Click interaction for quickView in Axure
In INDIGO STUDIO, you add the interaction first, and then in the resulting state make UI changes the users would see. The prototype workflow is as follows:
- Select the preview button and
add interaction - Pick
when user Clickspreview,change this screento anew state - Add necessary UI elements to create the productPopup
Watch Video Clip - Adding Click interaction for preview in Indigo Studio
Also, Indigo Studio, by default you are creating screen-states and not widget-states. Learn how to create interactive widgets. The screen state is auto-named "Taps/Clicks-Preview" (interaction-UI Element name), which you can change if required.
2. Case Editor for UI changes (Axure) vs. Direct Manipulation in Context (Indigo Studio)
In WYSIWYG tools, if you wish to resize an element, it's preferred that you can select it and resize it using the resize adorners. This is more DIRECT manipulation as opposed to using a separate interface to edit the UI.
We can call it INDIRECT manipulation when you are relying on an alternate representation or abstraction to do something. When working with abstractions, one tends to rely more on proper naming to locate an element to edit; we have to translate what it represents. And when making changes use some imagination to understand what the changes imply in usage context of the UI element.
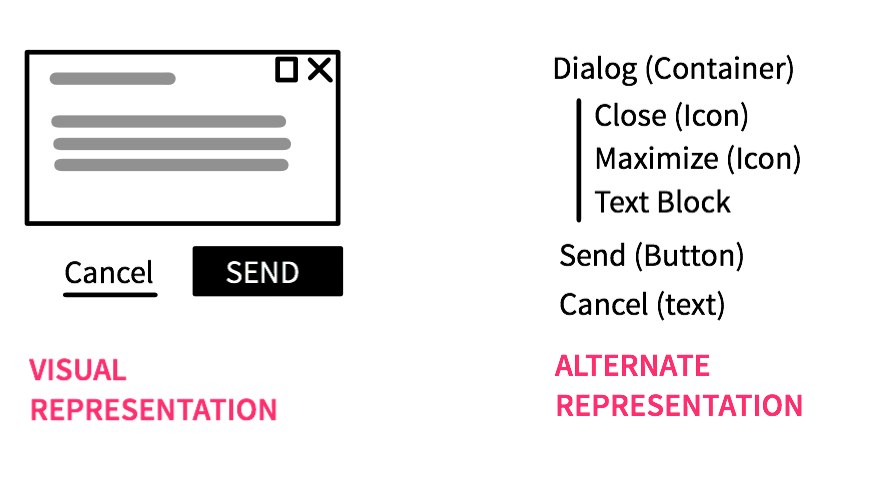
Thinking about this in physical world terms, it's like asking a friend to shop clothes for you, and all you have given her is a list of clothing items to buy. You have control over the items in that list, and some descriptions. The final outcome is mediated by your friend. All this does not mean manipulating abstractions is all bad because depending on the situation, it may be the easier or only option. Based on the task, we will have to decide which works better - direct or indirect manipulation.
Continuing with the same example for showing productPopup when the user clicks on quickView button, in AXURE the case Editor is the glue that binds the interactive prototype. The Case Editor does not work on it own; using it you are manipulating the state of dynamic panels and UI elements (using proper naming). Making any change to the UI based on an interaction is meditated by the case editor. While this facilitates a one-stop shop for all behaviors, the trade-off is less direct manipulation.
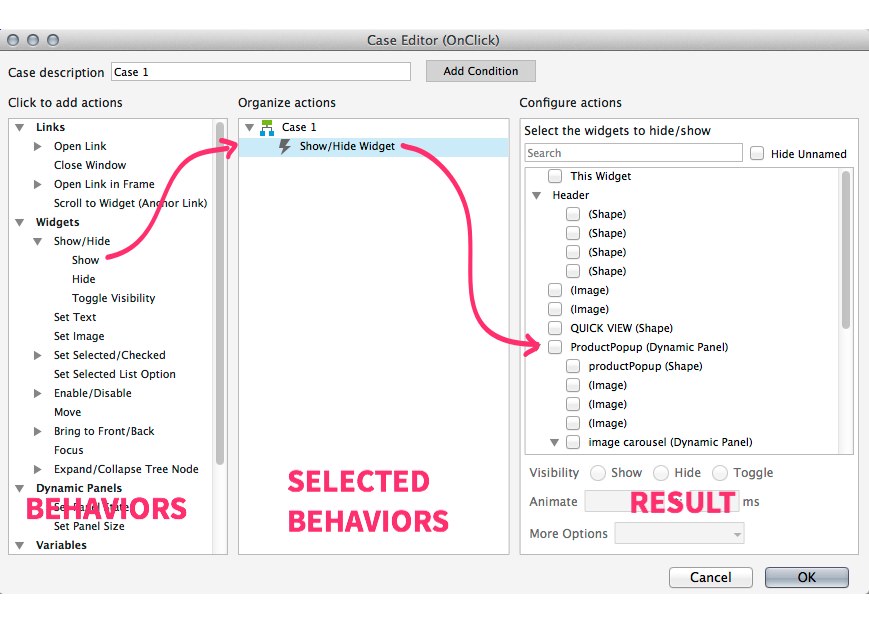
In our example, adding an onClick interaction on the quickView button would launch the case editor. The case editor is organized into three panels - generic behaviors, list of behaviors you select, affected elements or the result. As a prototyper, you will first select a behavior, and then dictate the results. Here is also when proper naming is important as it will help you locate the right UI element or dynamic panel in the RESULTS pane. In essence, the changes the user would see is mediated (indirect) exclusively via the case editor.
In Axure, once you create a dynamic panel and set to hidden, as is the case with productPopup, what remains visible in the designer is a yellow highlight where the panel should appear. You have control over the position and size of the panel. When you edit this panel, it will launch another tab in your designer where you are within the scope of the dynamic panel independent of the screen/usage context. To see how it works in the prototype, you will have to run it.
Watch Video Clip - onClick Showing the productPopup in Axure
INDIGO STUDIO's approach leans more towards direct manipulation. To show a productPopup when the user clickspreview, you first add an interaction (default is clicks), which will let you create a new screen state. Since the productPopup is shown on top of existing screen content, creating a new screen state is appropriate. In this new state, you design exactly what you want to see. As in, make whatever changes that are required to simulate the productPopup. It's different from Axure as these changes don't have to be restricted just to the productPopup you are creating; you can add/remove/edit any UI element on this screen state.
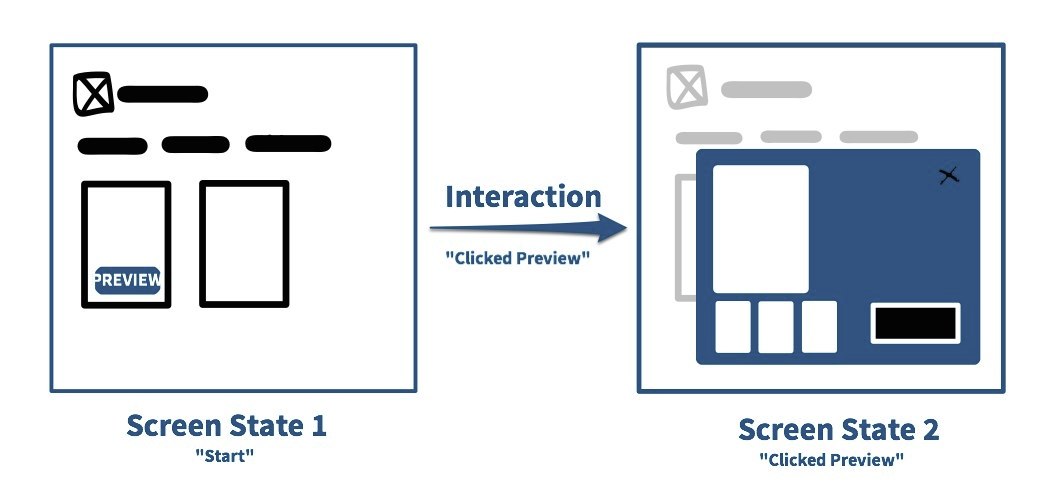
Drawing a new container UI element on this new state is the same as setting show/hide in Axure minus the need for a case editor. The prototyping flow is such that adding an interaction and design what should happen (be shown) next is a mini-squence. This means that you don't need to have this productPopup created beforehand; you create it as and when needed.
In Axure, you pre-create the required design elements and dynamic panel states. With Indigo Studio, you add the interaction first, and choose to create a new state. After that it's like designing any screen using WYSIWYG design tool. UI changes you make are always on top of the original screen context (previous state) so you know where you are in the user flow.
Watch Video Clip - Showing the **productPopup in Indigo Studio
Summary
This is part one of two-part series comparing prototyping in Axure with Indigo Studio.
Read part 2 to see additional differences:
- Adding time-based changes via actions vs. coordinating changes using a timeline
- Manage Prototype using alternate views vs. Interaction Explorer for visualizing user flow
- Widgets States vs. Screen States plus widget states
Hopefully this will give you a better idea about the prototyping workflow and conceptual model underlying both the tools.
Complete video tutorial for each tool is available below.
- Watch Prototyping with Axure | Download Axure Project
- Watch Prototyping with Indigo Studio | Download Indigo Studio Project
Please Note If you notice inaccuracies, please let me know so that I can correct them. Some of the steps may have been omitted in the interest of time.
About Indigo Studio for Interaction Prototyping
Don't have Indigo Studio? Download a free 30-day trial which will let you try all of the prototyping goodness.
Looking to suggest improvements and new ideas for Indigo Studio?
If for some reason you are having trouble with Indigo Studio, check out our help topics, forums or contact support.
Follow us on Twitter @indigodesigned